Minecraft “Demo Pack” (Texture and World)
This small pack contains the cow texture from the PC Gamer Demo of Minecraft, as well as the demo map. This is not my work, I simply took the files from the demo. This texture pack is just a curiosity for those who want the PC Gamer-branded cows in the standard game.
The texture should work on all versions of Minecraft, as it only alters the cow texture. The save is a clean world as it would appear at the beginning of the demo (a starting chest and a giant PC Gamer logo being two points of interest). The save folder and the texture zip are contained within the linked zip file:
DOWNLOAD
To install, just drop the two files into their relevant folders (which can be accessed from the Minecraft menu). The pack has its own thread on the Minecraft forums.
Screenshots (click to enlarge):
One Million!
We’ve finally reached one million views today! And it’s only taken four years. 😛
I haven’t been giving the site much attention recently, but hopefully that might change in the future. Make sure to follow me on Twitter or sign up for an email subscription in the sidebar to be notified when I have any new posts.
-legoless
Skyrim Full Trailer Released
Bethesda have released the full trailer for the upcoming Elder Scrolls game, Skyrim. You can see it on their official website, Game Informer or YouTube:
It was definitely worth the wait. In the video you can see the new Dragon Shout powers, the dual-wielding option and the advanced graphics in action. What are your opinions? Leave them below in the comments!
-legoless
Oblivion DLC – Knights of the Nine
This post will be about the Knights of the Nine official DLC for Oblivion, which adds a new questline and powerful new artifacts to the game.
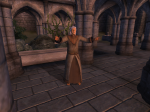
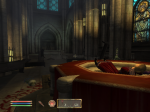
Upon loading, you should start to hear people talking about an attack on the Chapel of Dibella in Anvil. All the priestesses were murdered, and now a prophet is ranting about the start of an attack on the Church itself. Visiting Anvil, you’ll find the chapel has been desecrated with the blood of the priestesses. By talking to the Prophet outside, you’ll discover that Umaril the Unfeathered, an ancient Ayleid king, has risen again and seeks revenge on the Gods. Umaril was killed long ago by the champion of men, Pelinal Whitestrake, using weapons and armour given to him by the Gods. But Umaril joined himself with the Daedra. Like the Daedra his spirit can’t be killed, and now he has returned. The only way to defeat Umaril is to find the Crusader’s Relics. But the Relics have been lost in time. Only by admitting to the Prophet that you are not a worthy knight will he tell you how to find them: you have to pray at the wayshrines of the Nine Divines.
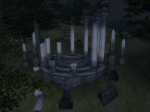
Wayshrines are circular altars out in the wilderness that you may have come across before. This plugin changes how they function a bit. After praying at a wayshrine to each of the Nine you would usually receive a Greater Power called Pilgrim’s Grace, but to get that now you have to complete this quest and then do the pilgrimage again with no infamy. But during the quest you will be cleared of infamy and then given a vision of Pelinal Whitestrake, up in the clouds above the Imperial City. He tells you that after his death, his friends built him a shrine in the old Ayleid settlement of Vanua. Vanua has since sunk into Lake Rumare, but can still be accessed after a short swim.
Vanua has a strange mix of Ayleid and Imperial fort architecture, with a few natural caves thrown in as well. It’s filled with undead, but it has a good number of welkynd stones. Eventually you’ll reach a dead end, with two locked doors. On the ground you’ll find the skeleton of Sir Amiel. Take his ring, his journal and his key. The journal explains that he was a Knight of the Nine, a holy order dedicated to finding and protecting the Crusader’s Relics. The ring will be needed later. The key opens up both locked doors (one leads up to the shrine, the other is a shortcut to the entrance). The Crusader’s shrine can be seen on a balcony overhead, and you can skip a lot more enemies if you can jump up to it. Otherwise go through the caves. Once you reach the shrine, take the Helm of the Crusader. It was created by Dibella, and fortifies your restoration and personality, as well as adding the ‘Serene Beauty’ calm spell when equipped. Note that you need an infamy of under 2 to wear any of the Relics, so if you’ve picked up more you’ll need to do the whole pilgrimage again.
Your only other lead on the Relics is the skeleton below you. His journal marks the Priory of the Nine on your map, which is in the West Weald. Going there you’ll find an abandoned priory house and chapel. But if you look around the priory house you should find a symbol on the floor, which you can fit Sir Amiel’s ring into. This will cause the symbol to sink down into the ground, creating a stairway and revealing the door to the basement. In the basement you’ll find the entrance to the crypt, which is the final resting place for most of the old Knights. Inside you’ll find the Cuirass of the Crusader, but before you can take it the ghost of Sir Amiel appears. He explains that you have to fight each of the Knights (who also appear around you) in single combat. Once you do, he’ll attack you himself. By defeating him you will earn his respect, and can take the cuirass. It fortifies your health and restoration, and has a chance of resisting normal weapons (unenchanted weapons, not counting silver or Daedric). You can use the stand it was on to display the Relics when not in use, and putting them on it repairs, recharges and levels them.
You can talk to the rest of the knights to gain clues about the location of some of the Relics. You can do the quests in any order, but I recommend getting the gauntlets last.
To retrieve the Boots of the Crusader, you need to visit the Shrine of Kynareth. Instead of a chapel, the followers of Kynareth worship her outdoors “in the chapel of Her creation”. Talking to Avita Vesnia will reveal the location of the Grove of Trials, an unmarked cave nearby. Once there you get attacked by a giant bear called the Forest Guardian. Don’t attack it. Doing so will fail the quest and possibly add infamy. Eventually the bear will stop attacking and walk away, and the door into Kynareth’s Grotto will appear. Inside you’ll find two friendly spriggans (don’t kill them or you get infamy) and the Boots. Wearing them will fortify your restoration and give you the Woodland Grace ability, which means that natural animals won’t attack you. When you return to the priory you’ll find Avita there, asking to become a Knight of the Nine. Granting her request will change her name to Sir Avita, and she will be equipped with a Knights of the Nine cuirass and shield, as well as chainmail armour. Also, the Chapel of Mara in Bravil will be desecrated after this quest (although you won’t hear it from anyone other than your knights, and the townspeople don’t seem bothered). One of the advanced restoration trainers, Marz, will be killed along with the rest of the priests and priestesses.
After you recruit your first knight, two Nord brothers named Geimund and Gukimar will show up at the priory on their horses. They served in the Legion for a while, and came all the way from Skyrim to join your Crusade.
To retrieve the Mace of the Crusader, you have to go to the Chapel of Zenithar in Leyawiin. The priests there don’t like your quest for the Relics, but you’ll meet Carodus Oholin who is friendly towards you. He’s there to protect the priests, who fear another attack. To get the mace you need to go into the undercroft and pray at the tomb of Saint Kaladas. You will be transported to a void, with the Mace in the distance. To get to it you must equip the Boots of the Crusader, which will create a glowing blue path over to the Mace. Grab it to be teleported back to the undercroft. When you enter the chapel you will find it being attacked by strange golden creatures called Aurorans. These are in fact Daedra, and are the servants of the Daedric Prince Meridia (who is Umaril’s ally). The priests and even random citizens can be killed during the battle. If you’re any good with blunt weapons, you should use the Mace as Auroran’s are weak to fire magic. (The Mace will also turn undead, which will be handy later on, and it adds the Crusader’s Arm effect which fortifies your blunt skill.) By searching the Aurorans’ bodies you can find gems, jewellery, enchanted Ayleid battle axes which deal shock damage and even some welkynd stones if you’re lucky. After the attack the priests will be a lot more sympathetic to your holy quest, and Carodus will ask to become a Knight of the Nine.
To receive the Shield of the Crusader you need to go to Fort Bulwark, which was built by Sir Henrik and his friends to keep the Shield safe. The abandoned fort has recently been taken over by a group of conjurers who seek the Shield as well. In the first area you need to find a turn handle to open a gate needed to proceed. (You can also find a conjurer’s note which hints at a puzzle further on.) Follow the path behind the gate and you’ll come to a balcony with another handle. Turning it will lower two drawbridges in front of you. Backtrack to the drawbridges to come to a room with panels on the floor. You need to stand on the panels according to the candles on the wall (which were placed there by the conjurers, according to the note). The proper sequence is left panel, right panel, middle panel, left panel. This will open up the gate in front of you, giving access to the next zone.
The next area is being used as a torture area. Inside a cell you’ll find Sir Thedret, a knight also seeking the shield. Free him and he will give you another clue to a puzzle, and will then exit the fort claiming he’ll see you again. Continuing on, you’ll reach a large amount of dart traps on the roof, over a set of drawbridges. The darts fall in sequence, so if you watch carefully you can make it through unharmed. Or you could just run like hell. In the next room you’ll find four statues and a large statue of Julianos. These are the guardians Sir Thedret told you about. You need to use the turn handles located on these statues to make them face the circle on the floor. This will open up a door into the final zone.
In this zone you’ll find a large room with many chests around the wall, and one chest in the middle. By watching the chests you’ll notice that items appear over them. Remember these items and step on the panel in front of the middle chest to receive one of them. Your goal is to place each item from the chest into the proper chest along the wall. Once you do the statue above will light up. When all statues are lit up the wall behind the middle chest will move, revealing the Shield. It has a chance of reflecting spells cast at the player. Use one of the side passages to the right or left to take a shortcut back to the first zone. Return to the priory to be greeted by Sir Thedret, who will join the Knights of the Nine (without asking for your permission) and become your second-in-command. As long as this isn’t the last quest (because if it is you will be greeted by Lathon upon your return) then a smith named Sergius Turrianus will appear in the basement, saying Thedret and him go “way back” and he said there was need of a smith. There isn’t actually, as all the Relics are repaired for free when put on the display dummy in the priory undercroft and NPCs never use smiths, but it’s a nice touch.
To get the Gauntlets of the Crusader you need to go to the Chapel of Stendarr in Chorrol. Sir Casimir, the ghost who tells you about them, had killed a beggar by striking him while wearing the Gauntlets of the God of Mercy. Because of this, him and his entire lineage was cursed, and the gauntlets fell to the floor. They became unnaturally heavy, and no mortal man could lift them. By going to the chapel in Chorrol, a priest there tells you that an ancestor of Sir Casimir, Kellan, came to the chapel to see if his curse could be lifted. The curse makes the bearer constantly weary. By talking to Kellen, you learn that he suspects the priest you talked to (Areldur) knows how to lift the curse. Areldur admits that he could lift the curse, but it would mean taking it on himself. You need to do it, so pray at the altar to receive the ‘Lay Hands’ lesser power. Use it on Kellen and he will start running around, thanking you. For the rest of the game he will run from city to city. Now you can lift the gauntlets, but your fatigue has been badly damaged. The Gauntlets fortify your restoration skill, and help you resist disease. They also add the ‘Merciful Touch’ spell, which allows you to heal others at a stupidly low magicka cost. Areldur will wander off to rethink his calling, and will eventually show up at the priory wanting to become a Knight.
Once you’ve completed all four of the ghosts’ quests, a squire named Lathon will show up at the priory. You may have met Lathon and Sir Roderic of Wayrest while on your pilgrimage, as Sir Roderic also wanted to become a Crusader. But it seems when Roderic finished his pilgrimage, he recieved a terrible vision from Sir Berich. Sir Berich was once a Knight of the Nine, but was corrupted by the War of the Red Diamond and killed Sir Caius with the Sword of the Crusader. Sir Caius admits that it was he who first drew his sword, however. Anyway, Sir Roderic became convinced he had to free Sir Berich from evil. He eventually found the tomb of Lord Vlindrel (Sir Berich) in Underpall Cave, which is actually an underground burial site. Inside they recovered the Greaves of the Crusader, but Sir Roderic was slain by the wraith of Lord Vlindrel who wielded the Sword of the Crusader. Lathon ran away with them, and now will give them to you. The Greaves fortify your restoration and destruction magic, and give you the Blessing of the Eight spell, which shields your allies. Lathon also requests to become a Knight of the Nine and wants to accompany you Underpall Cave to avenge Sir Roderic.
Underpall Cave is in the vanilla game, but this mod adds Lord Berich’s tomb to the last zone, and also replaces the necromancer boss at the end with Lord Vlindrel’s ghost during this quest. The dungeon is filled with undead, so the Mace of the Crusader will be useful here. There’s also a vampire in there somewhere, if you’re looking for vampire dust. Sir Lathon usually gets himself killed inside, so it might be smart to leave him outside if you think you can handle it yourself. Once you reach the area with the underground lake, look for Lord Vlindrel. He looks like a Gloom Wraith, but has the same glowing effect as a Nether Lich. Kill it and take the Sword (but don’t equip it, because you’ll get cursed for the rest of the quest). The Sword has been turned to evil, so you need to go to the Chapel of Arkay (it’s creator) in Cheydinhal and reconsecrate it. When you arrive you’ll find the chapel under attack from Aurorans. Kill them off. It’s too late to save Arkay’s living saint and the last advanced restoration trainer, however. That means that if you ever wanted to get the restoration master training quest you just missed your chance. Activate the altar to reconsecrate the Sword, and then head back to the priory. The Sword does fire damage and drains an enemy’s magicka, and gives you the Crusader’s Arm effect (which fortifies blade this time). When you equip all the Relics, you gain the Holy Aura, Umaril’s Bane and Crusader’s Bane effects.
When you arrive at the priory you’ll meet Sir Thedret, who says that the Prophet is preaching in the chapel. Inside you’ll find your Knights and Brellin (a Bosmer from Silvenar, Valenwood, who worships Akatosh and wants to join the Crusade) listening to the Prophet. Talk to the Prophet, who will congratulate you on gathering all the Relics and claim that you are Pelinal Whitestrake reborn. He will then tell you that your quest was pointless because Umaril’s spirit will simply return to Oblivion when killed. However, in Pelinal’s time there were only Eight Divines, because Tiber Septim hadn’t ascended to become Talos yet. The Prophet grants you Talos’ blessing, which will allow you to follow Umaril’s spirit and destroy him once and for all. The Blessing of Talos is a lesser power with zero magicka cost. It drains your speed an agility while fortifying your strength and endurance. It also has a script effect, which only has an effect when following Umaril’s spirit.
The Prophet says that Garlas Malatar, an old Ayleid ruin, is Umaril’s stronghold. Your knights set off at once, and if they survive the journey there will be waiting outside the ruin for you. A lot of the knights may die inside, and if they do they will be replaced with generic, unnamed ‘Knights of the Nine’ at the end of the questline. When you launch the attack, Aurorans will come out of the ruin to attack. Be careful when attacking them, because it’s possible to hit one of your knights by mistake when they swarm around them. Inside the ruins you’ll find more Aurorans and some welkynd stones. Your knights will gather around three locked gates. This would be a good time to rest for a while or heal them with magic. Once you’re ready to continue, activate the push block to open the gates. Both paths are filled with Aurorans and whichever path you don’t follow will probably have multiple fatalities. Your knights will rush into the second zone, but feel free to explore a little before you continue.
In the second zone your knights will be trapped behind gates again, so make sure to heal them as there’s a battle ahead. Activate the push block, but ignore the Aurorans as they can’t die in this zone. You need to rush past them and get up to the area with the Dark Orb. This is what’s keeping the Aurorans alive. Activate it to shatter it. This will cause your knights and the attacking Aurorans to disappear. Go back for any loot you missed if you want, and then continue on alone into the third zone. There aren’t many enemies in this area, but at the end of it you’ll find Umaril. He has some nasty shock spells, but should be easy enough to kill. Take the two varla stones and Umaril’s sword and have a look in the boss chest before you cast the Blessing of Talos. Once you do a dense fog will appear and you’ll be transported into the spiritual plane once again (the same place you met Pelinal). Kill Umaril again (it should be easier this time), and you’ll begin falling towards the Imperial City below.
You wake up in the priory undercroft, were you are congratulated by the ghost of Sir Amiel. You might want to turn on subtitles though, because he speaks way too quietly. He says that he and the rest of the ghosts can now depart, but you can activate their tombs for blessings. I always activate Sir Amiel’s tomb because he gives the blessing of Akatosh, which fortifies strength. (Although I don’t know why he has a tomb since his skeleton is in Vanua.) All the ghosts disappear then, except for one. The ghost of Sir Berich thanks you for freeing him from the evil that had corrupted his soul, before following his companions. Upon walking out of the undercroft, Sir Thedret shows up. He says that after the battle they found your body, and thought you had had the same fate as Pelinal. Follow him outside where the rest of the knights had gathered and listen to his speech (but don’t interrupt anything because there are a lot of glitches associated with this). After the celebrations, the knights will resume their usual schedules and the questline is over. You get a shiny new set of armour and the knights can be used as companions. The priory is also fully repaired by now.
Any priests who die during the questline will usually be replaced at the end. However, the replacements for Mars and Ohtesse cannot give you the recommendation needed to get master restoration training. Several books are also added by this plugin, which can be found in chapels or bought from Southern Books in Leyawiin. By starting the pilgrimage you become a Pilgrim of the Nine Divines faction, which allows you into all areas of a chapel and lets you take things from them without stealing. This makes the Thieves Guild quest The Elven Maiden especially easy, as the undercroft guard won’t even attack you. An abandoned fort named Lord Vlindrel’s Tower, located southwest of Chorrol is added by this plugin. It was probably the original site of Sir Berich’s tomb, but now it doesn’t even have a dungeon and serves little purpose ingame.
A mod this size will have its fair share of bugs (the biggest ones for me being the stupid Anvil chapel attack rumours appearing on NPCs which shouldn’t have it and all the new icons being fuzzy unless the graphics are on high) but all are avoidable or unnoticeable so I won’t include them. This plugin adds a lot more hours of play to the game, and not only does it prove that the Nine Divines actually do stuff but it also continues on the story of Pelinal Whitestrake who was only ever mentioned in books before. The Aurorans are cool too, and since infamy has mostly negative effects on gameplay, it’s good to be able to get rid of it. I also like the Prophet, because it seems like he’s an avatar of Talos. Note the similarities between him and Uriel/Martin Septim (both direct descendants of Tiber Septim), the fact that he refers to the gods as the Eight and One (which is old-fashioned) and the way he casually gives you the Blessing of Talos. It wouldn’t be the first time Talos appeared as an avatar, either (Wulf from Morrowind, for example). Overall, I think this questline is fun to play but a bit too dominating on the rest of the game.
Screenshots (click to enlarge):
The Prophet in Anvil.
The desecrated chapel in Anvil.
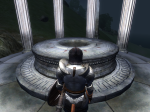
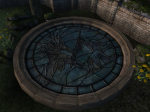
One of the wayshrines to the Nine Divines.
Speaking with the legendary Pelinal Whitestrake in the skies above the Imperial City.
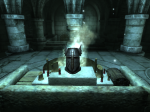
The helm of the Crusader on the altar in Vanua.
Fighting the ghosts of the original Knights of the Nine as they protect the cuirass of the Crusader.
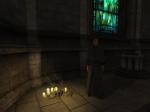
A stained glass window above the priory crypt, depicting the battle between Pelinal Whitestrake and Umaril the Unfeathered.
The gauntlets of the Crusader and their caretaker, Areldur, in the chapel in Chorrol.
The Shrine of Kynareth, located in the heart of the Great Forest.
Sergius Turrianus, a blacksmith invited to the priory by Sir Thedret.
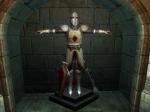
Knights of the Nine training in the priory basement.
The fully-restored Priory of the Nine.
The entrance to Kynareth’s Grotto, location of the boots of the Crusader.
Garlas Malatar, an Ayleid ruin being used as a base by Umaril. Also contains the only respawning Aurorans.
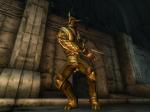
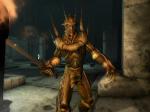
An Auroran, servant of Meridia.
Fighting Umaril for the first time in Garlas Malatar. After you defeat his physical body, you need to follow his spirit before it escapes back to Oblivion, and fight him a second time.
The Crusader’s Relics on display on the armour stand in the priory crypt.
My next post will be a review of the Main Quest in Oblivion. To make sure you keep up-to-date on any new posts, you can follow me on Twitter or get notified by email by subscribing using the widget on the sidebar.
Other Oblivion Posts:
- Oblivion
- Horse Armour
- Orrery
- Wizard’s Tower
- Thieves Den
- Mehrunes’ Razor
- The Vile Lair
- Spell Tomes
- Fighter’s Stronghold
-legoless
Oblivion DLC – Fighter’s Stronghold
This post will be about the Fighter’s Stronghold plugin for Oblivion, which adds a player home suited for fighter characters.
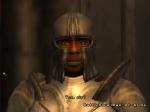
When you start the game with the plugin installed, you get a journal update saying you heard a rumour about a siege at Battlehorn Castle. The lord of the castle has been killed, and the defenders are offering the castle itself as a reward for anyone who can help lift the siege. Battlehorn Castle is located at the end of the Black Road, west of the city of Chorrol. When you arrive there you should find four marauders and the besieged defenders battling it out. On the ground you’ll find the corpse of Lord Kelvyn, the previous owner. Once all the marauders have been defeated, talk to one of the remaining men-at-arms. They will present you with Lord Kevlyn’s will, which gives you legal ownership of the castle.
The will explains that Battlehorn Castle was built by remnants of the Knights of the True Horn, who were banished from Hammerfell when they failed to dethrone Baron Shrike of Lainlyn. Their leader, Lord Kain, ordered the Knights to split up into small groups until he called for them to regroup. Lord Kevlyn’s father, Lord Jaren, was part of the group to settle in Cyrodiil. All the others disbanded or passed on, and Lord Jaren came to be the leader of Battlehorn Castle. However, the Knights had fallen on hard times, and many of the furniture had to be sold to pay for castle maintenance. Lord Kelvyn recommends finding Nilphas Omellian, who may hold many of the original items. Of course, you’ll have to pay off the debts to get them back.
Without the upgrades, the castle is fairly bare. There are very few inhabitants: two men-at-arms to guard the castle, Niels the smith (he lives in a hut in the courtyard) who can repair your gear, and the smith’s pet wolf, Hjalti. There’s an altar to Julianos in the great hall, a dusty old hunting trophy (a stuffed black bear) in the east wing, a vat in the cellar containing 20 bottles of mead, a bed in the private quarters and a few hidden secrets (which I’ll talk about later). Nilphas can be found at The Merchants Inn in the Imperial City Market District. The upgrades you can buy from him are:
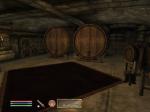
- A wine cellar upgrade. This adds wine racks, a second vat (with 20 bottles of cheap wine in it) and many smaller vats (for unique wine) to the cellar. It also hires a vintner named Talan, who is a brother of the famous winemaker Tamika of Skingrad. Given the right ingredients, he can make unique wines added by the plugin. These appear in the seven small vats (one for each new wine). Talan will also restock the two large vats with mead and cheap wine.
- A bedroom upgrade. This adds a larger bed, some much-needed furniture and a personal maid to your private quarters. The maid, Rona Benanius, can serve you any drinks the wine cellar has in stock, as well as cheese, grapes, sweetrolls, Shepard’s Pie, strawberies and mutton. She also sometimes knocks over items you have on display, and will take a weapon to defend herself with if attacked. She can be told to follow the player.
- A kitchen area upgrade, which adds some cupboards, tables and a dead deer to a room in the basement. It also hires Plautis Rusonius, a cook who used to work at the Tiber Septim Hotel in the Talos Plaza District of the Imperial City. He can provide you with the same stuff as your maid.
- A library upgrade, which adds a large amount of books to your private quarters.
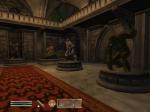
- A trophy room upgrade. It hires Melisi Daren, a taxidermist, and transforms an empty room in the east wing into a taxidermy area. By giving her pelts or ingredients collected from dead enemies, she can create replicas and will put them on display in the great hall. She can create eight stuffed replicas: wolf, (brown) bear, lion, troll, ogre, minotaur, clannfear and daedroth. The daedroth replica is placed on a stand near the entrance, while the rest are in a room behind.
- A barracks upgrade, which adds two more men-at-arms and a captain called Castellan Athon. The men-at-arms respawn, but if the captain dies you can buy another (nameless) castellan from Nilphas.
- A training area upgrade. This adds several training dummies and archery targets to a room in the basement. It also hires a sparring partner, Shagrol gro-Uzug. Shagrol was once a famous Arena champion. When sparring, he uses special weapons which cause no damage (good for training block, but won’t help you train light or heavy armour). As he’s marked essential, he won’t die but will simply be knocked unconscious.
- A dining area upgrade, which turns the crappy benches and ceramics in the east wing into upper-class silverware and fancy tables and chairs.
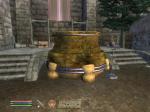
- Once you’ve purchased at least one other upgrade, Nilphas will send a letter to Battlehorn Castle. It will be delivered to you by one of your men-at-arms. Nilphas has come into possession of an ancient Dwemer forge, and is wiling to sell it to you – even though by law you need an Imperial charter to trade Dwemer artifacts (although no merchants in either Vvardenfell nor Cyrodiil really care). It will replace the generic forge in the courtyard once purchased, and standing near it will fortify your armourer skill by 15 points. Plus it looks awesome.
Once you’ve bought all the upgrades, a chest will be placed at the end of your bed. Inside you’ll find Lord Kelvyn’s Bulwark, an enchanted shield with the emblem of the Knights of the True Horn displayed on it (the same as the shields your men-at-arms have). But it doesn’t end there. Like all castles, Battlehorn has a few secret passages. One can be found by using the door at the back of the wine cellar. It will lead to a small, closed-off room. If you look carefully however, you will see a movable pillar on the wall. The wall will slide down and you’ll find yourself in the great hall. A second movable pillar can be found in your private quarters, which will reveal a secret storage room. Inside you’ll find the journal of Lord Jaren, Kelvyn’s father.
It tells of how, when only himself and his friend Garridan were in the castle, Lord Kain arrive. He was accompanied by Arielle Jurard – not the friendly battlemage from a Mages Guild quest, however. This Arielle was a necromancer. Lord Kain had trouble speaking and moved like an old man, and left a bad smell behind. Arielle explained that Lord Kain had died in battle shortly after the Knights split, but she had raised him again and planned to use him as an undead puppet once Baron Shrike was defeated. Lord Jaren was appalled, and he and Garridan sealed them into the ‘grotto’. He had planned to tell his son Kelvyn about it one day, but as explained in Lord Kelvyn’s will his father had a premature death and obviously never got around to it.
The journal hints that the entrance to the grotto was once in the training room. Behind the archery target you’ll find an unlit candelabra. Pulling it will open up a secret tunnel which leads down into the grotto. Inside you’ll find a skeleton and a nether lich. Arielle somehow transformed herself into a lich, and according to a scrap of paper found on her body the skeleton was the remains of Lord Kain. The resurrection hadn’t worked properly and his flesh had decomposed, but he still remained “alive”. Lord Kain holds two unique items: the Dragonsword of Lainlyn, an enchanted longsword which gives the player a special fire spell when equipped, and Lord Kain’s Shield, another enchanted shield of the True Horn, which gives off 10 feet of light. You can also find three varla stones and a loot chest in the grotto.
This plugin is my favourite player house. It adds a lot of unique items and has some interesting upgrades. Plus, you get your own castle. I also really enjoyed the references to The Elder Scrolls II: Daggerfall. Baron Shrike, Lord Kain, Lainlyn and the Knights of the True Horn all appear in Daggerfall. Baron Shrike was the leader of the Host of the Horn, the official military force in Lainlyn, Hammerfell. Lord Kain was his brother, but Shrike was a ruthless leader and Kain formed the Knights of the True Horn to dethrone him. This mod continues the story, and even though I never played much of Daggerfall I enjoyed reading about the lore. The altar to Julianos is also a nice touch, as Julianos is the main deity of Lainlyn.
The knight who helped Lord Jaren seal up the grotto, Garridan, can be met during the miscellaneous quest ‘Tears of the Savior’. He is frozen in a block of ice, and the quest is to collect his frozen tears which have been transformed into crystals. More can be learned from the ingame book Knightfall, which is written by a ‘Jaren Aethelweald’. The taxidermist you hire comes with a recommendation from her previous employer, a man named Baenlin. In a Dark Brotherhood quest you have to kill Baenlin by dropping a mounted minotaur head on him (which was probably made by Milisi). These easter eggs really make the mod more fun. However, this plugin was also the hardest to obtain, as it doesn’t come with any retail disc and the Bethesda online store doesn’t accept PayPal. >.> Buying Oblivion off Steam is probably the easiest way to get it, as well as the rest of the DLC and the Shivering Isles expansion pack.
Screenshots (click to enlarge):
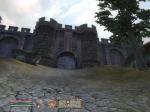
Battlehorn Castle exterior.
A man-at-arms.
A few of the stuffed replicas on display.
The wine cellar. Talan is hiding in the corner drinking all the expensive stuff, but you can’t see him from this angle.
The Dwemer forge. To be honest I think they just used the textures from Morrowind.
The secret grotto.
Nilphas Omellian, open for business.
Lord Kelvyn’s Chest. If he had worn his magical shield into battle maybe he wouldn’t have died. “But it would get all dented!” 🙄
My next post will be about the Knights of the Nine DLC (but it might take a while as this is the largest official plugin, and I’m back to school). To make sure you keep up-to-date on any new posts, you can follow me on Twitter or get notified by email by subscribing using the widget on the sidebar.
Other Oblivion Posts:
-legoless




Newest Comments